Breaks can be re-positioned to ensure that employees are not taking breaks at the same time.
On the View tab click on Timeline with Zoom before attempting to realign breaks
Viewing Break Alignment
- Click on the break of the first shift and hold the mouse button down to display the break borders in red:
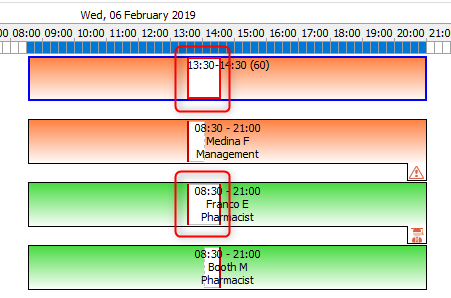
- Any breaks that align with the start of the selected break will show a red left hand edge
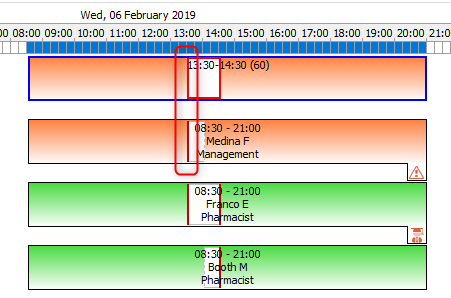
- Conversely, any breaks that align with the end of the selected break will show a red right hand edge.
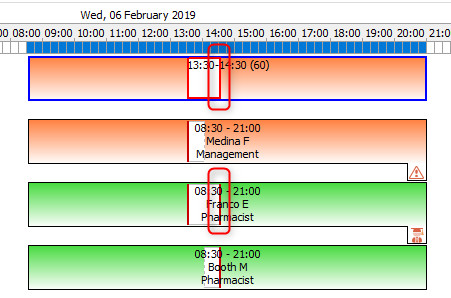
- Breaks that align exactly show matching left and right red edges.
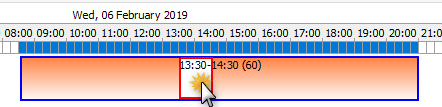
Break Details
When a break is selected and the mouse button is held down, the text displayed in the shift changes to the break details. This is dynamically updated as the shift or break is moved or sized.
- Below are the shift details before selecting the break:
- After selection, the display shows the break details while the mouse button is held down


Preventing Overlapping Breaks
- Click and hold the mouse pointer directly onto a break and then position the break by moving the mouse left or right.
- The following breaks can be aligned and positioned to prevent overlaps by using the simple onscreen tools described earlier.
- The shifts have now been positioned to ensure that no employees have breaks at the same time

